Create a Google Scholar Profile and/or Claim your ORCID identifier
For Day 1, we have something familiar and something maybe not sofamiliar. You are welcome to create a Google Scholar profile AND claim
your ORCID identifier, or just do one these tasks. Either way, it's
worth doing both eventually, if not today.
Skip to...
Google Scholar- Step 1: Create your basic profile
- Step 2: Add publication
- Step 3: Make your profile public
- Step 4: Add co-authors
- Step 5: Add missing articles
- Step 6: Clean up your Google Scholar Profile data
- Step 7: Learn how to export your publications list in BibTeX format
- Limitations
- Step 1. Claim your ORCID in under 30 seconds
- Step 2. Fill out your ORCID profile
- Step 3. Complete your publication record
- Step 4. Connect ORCID to the rest of your online life
- Limitations
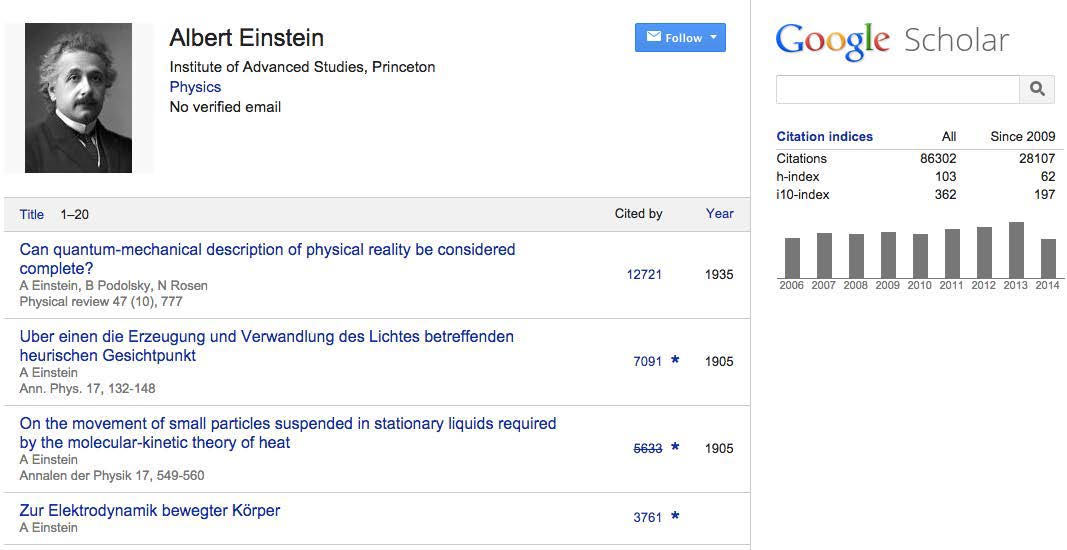
Google Scholar
Let’s dig in with Google Scholar.
allows you to showcase your papers and the citations they’ve received.
Google Scholar also calculates a platform-dependent h-index, which many
researchers love to track (for better or for worse).
so you can up your scholarly SEO (search engine optimization, aka
“googleability”), more easily share your publications with new readers,
and discover new citations to your work.
Step 1: Create your basic profile
- Log on to scholar.google.com and click the “My Citations” link at the top of the page to get your account setup started.
- On the first screen, add your affiliation information and
university email address so Google Scholar can confirm your account. Add
keywords that are relevant to your research interests so others can
find you when browsing a subject area. Provide a link to your faculty
page. - Click “Next Step,” and--that’s it! Your basic profile is done. Now, let’s add some publications to it.
Step 2: Add publications
Google has likely already been indexing your work for some time now
as part of their mission as a scholarly search engine. However, keep in
mind that Google Scholar does not index everything.
Google Scholar will provide you with a list of publications they
think belong to you. You’ll need to read through the list of
publications that it suggests as yours and select which ones you want to
add to your profile.
Beware--if you have a common name, it’s likely there’s some
publications in this list that don’t belong to you. And there’s also
possibly content that you don’t want on your profile because it’s not a
scholarly article, or is not representative of your current research
path, and so on.
clicking the “Change Photo” link on your profile homepage, and set your
private profile to “Public.”
profile visibility by clicking the link to "Make it public" under your
name and title. You can also make your profile public by clicking the
Edit button and selecting the box next to the words "Make my profile
public."
Google Scholar. However, you can only add co-authors who have already
created their own Google Scholar profiles. Google Scholar tries to find
authors who have user profiles and list them for you. Thus, if you don’t
see co-authors, it’s likely they don’t have Google Scholar user
profiles.
 That’s it! Now you’ve got a Google Scholar profile that helps you
track when your work has been cited both in the peer-reviewed literature
and, and is yet another scholarly landing page that’ll connect others
with your publications. The best part? Google Scholar is pretty good at
automatically adding new stuff to your profile, meaning you won’t have
to do a lot of work to maintain it.
as part of their mission as a scholarly search engine. However, keep in
mind that Google Scholar does not index everything.
Google Scholar will provide you with a list of publications they
think belong to you. You’ll need to read through the list of
publications that it suggests as yours and select which ones you want to
add to your profile.
Beware--if you have a common name, it’s likely there’s some
publications in this list that don’t belong to you. And there’s also
possibly content that you don’t want on your profile because it’s not a
scholarly article, or is not representative of your current research
path, and so on.
Read through the publications list and deselect any that you do not
want to add to your profile (like the below newsletter item that Google
Scholar thinks is a scholarly article).
Click the grey “Add” button at the top of your profile.

Confirm you want Google to automatically add new publications to
your profile in the future. If you’ve got a very common name, note that
this might add publications you didn’t author to your profile. But if
you’re a prolific author, it can be worth it for the time it saves you
approving new articles every month.
clicking the “Change Photo” link on your profile homepage, and set your
private profile to “Public.”
Step 3: Make your profile public
Your profile is private if you’ve just created it. Change yourprofile visibility by clicking the link to "Make it public" under your
name and title. You can also make your profile public by clicking the
Edit button and selecting the box next to the words "Make my profile
public."
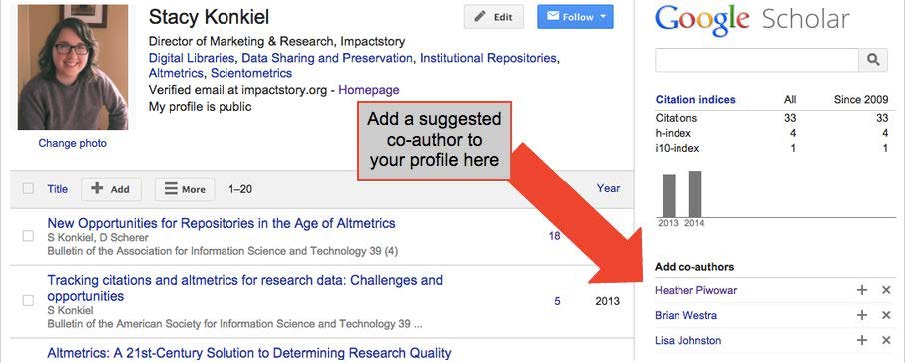
Step 4: Add co-authors
Adding co-authors is a good way to let others know you’re now onGoogle Scholar. However, you can only add co-authors who have already
created their own Google Scholar profiles. Google Scholar tries to find
authors who have user profiles and list them for you. Thus, if you don’t
see co-authors, it’s likely they don’t have Google Scholar user
profiles.
To add a suggested co-author, find the “Co-authors” section on the
top right-hand section of your profile, and then click the plus-sign
next to each co- author you want to add.
track when your work has been cited both in the peer-reviewed literature
and, and is yet another scholarly landing page that’ll connect others
with your publications. The best part? Google Scholar is pretty good at
automatically adding new stuff to your profile, meaning you won’t have
to do a lot of work to maintain it.
Step 5: Add missing articles
You might have articles that Google
Scholar didn’t automatically add to your profile. If that’s the case,
you’ll need to add it manually.
Scholar didn’t automatically add to your profile. If that’s the case,
you’ll need to add it manually.
Click the “Add” button in the grey toolbar within your profile.

On the next page, click the “Add article manually” link in the left-hand toolbar. Then you’ll see this screen:
Go ahead and add a new paper to your profile. Include as much
descriptive information as possible--it makes it easier for Google
Scholar to find citations to your work.
Click “Save” after you’ve finished adding your article metadata, and
repeat as necessary until all of your publications are on Google
Scholar.
Step 6: Clean up your Google Scholar Profile data
Thanks to Google Scholar Profiles’ “auto add” functionality, your Profile might include some articles you didn’t author.If that’s the case, you can remove them in one of two ways:
- Click on the title of each offending article to get to the
article’s page, and then clicking the “Delete” button a the top of the
page. - From the main Profile page, tick the boxes next to each incorrect article and click the “Delete” button in the top grey bar.
profile in the first place, you can change your Profile settings to
require Google Scholar to email you for approval before adding anything.
To make this change:
From your main Profile page, click the “More” drop-down menu that appears in the top grey bar:

- Select “Profile updates.”
- On the next page, change the setting to “Don’t automatically update my profile.”
are automatically added to your profile by signing up for alerts and
manually removing any incorrect additions that appear. Here’s how to
sign up for alerts: click the blue “Follow” button at the top of your
profile, select “Follow new articles,” enter your email address, and
click “Create alert.”
Step 7: Learn how to export your publications list in BibTeX format
There will likely be a time when you’ll want to export your GoogleScholar publications to another service Mendeley. Here’s how to do
that.
Tick the box next to each article whose details you want to export.
Click the "Export" button, and then choose BibTeX to export your file.
Click "Okay" to download your "citations.bib" file.
Limitations
Dirty data in the form of incorrect publications isn’t the only limitation of Google Scholar you should be aware of. The quality of Google Scholar citations has also been questioned,because they’re different from what scholars have traditionally
considered to be a citation worth counting: a citation in the
peer-reviewed literature.
Google Scholar counts citations from pretty much anywhere they can
find them. That means their citation count often includes citations from
online undergraduate papers, slides, white papers and similar sources.
Because of this, Google scholar citation counts are much higher than those from competitors like Scopus and Web of Science.
That can be a good thing. But you can also argue it’s “inflating” citation counts unfairly. It also makes Google Scholar’s citation counts quite susceptible to gaming techniques like using fake publications to fraudulently raise the numbers.
Additionally, Google Scholar is somewhat of an information silo.
You cannot export your citation data, meaning that even if you were to
amass very impressive citation statistics on the platform, the only way
to get them onto your website, CV, or an annual report is to copy and paste them--way
too much tedium for most scientists to endure. Their siloed approach to
platform building definitely contributes to researchers’ profile fatigue.
Its final major limitation? There’s no telling if Google Scholar will be around tomorrow. Remember Google Reader? Google has a history of killing beloved products when the bottom line is in question. It’s not exaggerating to say that Google Scholar Profiles could literally go away at any moment.
That said, the benefits of the platform outweigh the downsides for many.
Congratulations! You've made great progress and we're only on Day 1!
You
may now continue on to claim your ORCID identifier or pat yourself on
the back for completing the first step in the 7-day challenge.
Back to topmay now continue on to claim your ORCID identifier or pat yourself on
the back for completing the first step in the 7-day challenge.
ORCID
There’s a lot of potential for confusion and mistaken identities inscholarly publishing. You might share a name with other, similarly named
researchers! Or you might have changed your name at some point during
your career. How are others supposed to know if they’ve found the right
you?
Luckily, some smart people have been working to make name disambiguation easy.
ORCID IDs are permanent identifiers for researchers. They protect your unique scholarly identity and help you keep your publication record up-to-date with very little effort.
ORCID was founded in 2012 as a non-profit organization comprised of
publishers, funders, and institutions like Nature Publishing Group,
Wellcome Trust, and Cornell University. Over 1 million researchers have
ORCID IDs so far, and the number continues to grow.
Setting up your ORCID profile will help you claim your correct,
complete publication record. In this challenge, you’re going to claim
your ORCID ID so you can automate the collection of your work and
related metrics in a future challenge.
Here’s how to get started with ORCID.
Step 1. Claim your ORCID in under 30 seconds

- First things first: logon to ORCID.org/register and sign up for an ORCID account.
- At this step in the process, you’ll add very basic information like
your name and email address, choose a default level of privacy for your
profile, accept ORCID’s terms of use, and click “Register”. - If your name is already in the ORCID system, you’ll then be prompted to claim an existing profile or make a new one.
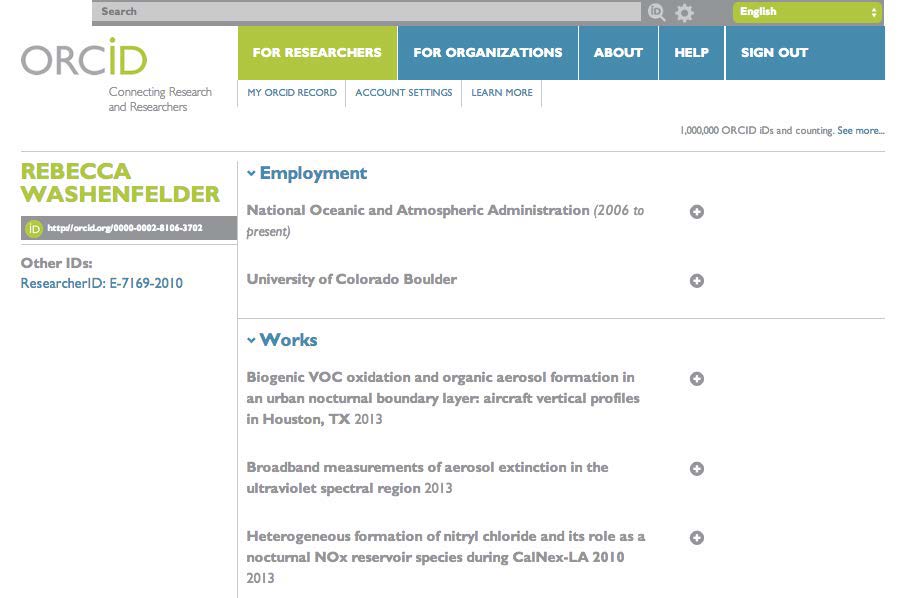
Step 2. Fill out your ORCID profile
Next, you’ll fill out your ORCID profile so that others can verify who you are, and also learn more about you.First, add links to your Google Scholar, your personal website, and any other websites where you’ve got a scholarly profile.
- On the left-hand menu on your main profile page, click the pencil “Edit” icon next to “Websites.”

- In the fields that appear, add links to your Google Scholar and
other professional profiles you’ve created. Also add a link to your
website or faculty page. Describe each link adequately enough so your
profile’s viewers know if they’re going to click a Google Scholar link
vs. something else. - Click “Save changes” when you’re done.
Import your publications by connecting other scholarly identifiers
Any type of scholarly output you create, ORCID can handle.Are you a traditional scientist, who writes only papers and the
occasional book chapter? ORCID can track ‘em. Are you instead a
cutting-edge computational biologist who releases datasets and figures for your thesis,
as they are created? ORCID can track that, too. Not a scientist at all,
but an art professor? You can import your works using ORCID, as well,
using ISNI2ORCID… you get the idea.
ORCID will even start importing information about your service to your discipline soon!
To connect to other identifiers and indices:
- From your main profile page, scroll down to the “Works” section and
click the “add some now” link. You’ll then be prompted to connect to
the services of your choice.

- Once you’ve connected your profiles, your works will be imported
automatically to ORCID. If you’ve connected another scholarly identifier
like your Scopus Author ID, a link will appear in your left-hand menu
bar.
Complete your personal information
Finally, add your education credentials and employment history that might not have imported when you connected other services.
descriptive information as you’re comfortable sharing, choose the level
of privacy you’d prefer under the “Who can see this?” section in the
upper right of the pop-up box, and then click “Add to list” to commit it
to your profile.
Step 3. Complete your publication record
It’s possible that not all of your publications and other works will have imported. You can add them in three ways:
- Manually by clicking the “Add Work Manually” button under your Works section and adding the publications one-by-one.
- Importing works from your Mendeley profile (if you have one already by) using the Mendeley2ORCID service.
Just login with your ORCID ID in the top-right corner of the screen,
approve a sync with Mendeley, and your works will be imported to ORCID. - Batch import your works using the new BibTeX import button.
You can export your works from Google Scholar, EndNote, and many other
reference management services in BibTeX format, then click the “Link
BibTeX” button under the Works section of your profile, upload your
BibTeX file, and you’re done!
BibTeX import, you can delete them by clicking the trashcan icon next to
the duplicate work’s title.
Step 4. Connect ORCID to the rest of your online life
You can connect your ORCID account with websites including Web of Science, Figshare, and Impactstory, among many others.Once they’re connected, you can easily push information back and
forth between services–meaning that a complete ORCID record will allow
you to automatically import the same information to multiple places,
rather than having to enter the same information over and over again on
different websites.
And new services are connecting to ORCID every day, sharing information across an increasing number of platforms–repositories, funding agencies, and more!
Limitations
ORCID is still a relatively basic service. You cannot edit incorrectentries, automatically detect and remove duplicates, or export your
profile information in BibTeX, JSON-LD, or other researcher-friendly
formats.
ORCID also has gaps in its coverage. It doesn’t find all of your
publications, all of the time, and connectable third-party services like
Scopus don’t always, either. That means you might have to manually add
some works and information to your profile, same as you do for Google
Scholar, and all other scholarly profiles.
Congratulations!
You have completed Day 1 of the 7-Day Challenge! Tomorrow you'll have
the option of creating an account on Academia.edu, ResearchGate, or
Mendeley.
You have completed Day 1 of the 7-Day Challenge! Tomorrow you'll have
the option of creating an account on Academia.edu, ResearchGate, or
Mendeley.
Day 1: Create a Google Scholar Profile and/or Claim your ORCID identifier - Raising Your Scholarly Profile - LibGuides at Duquesne University
No comments:
Post a Comment