In order to improve the quality of systematic researches, various tools have been developed by well-known scientific institutes sporadically. Dr. Nader Ale Ebrahim has collected these sporadic tools under one roof in a collection named “Research Tool Box”. The toolbox contains over 720 tools so far, classified in 4 main categories: Literature-review, Writing a paper, Targeting suitable journals, as well as Enhancing visibility and impact factor.
Monday, 16 May 2016
Make a profile on Academia.edu/ResearchGate/Mendeley - Raising Your Scholarly Profile - LibGuides at Duquesne University
Make a profile on Academia.edu, ResearchGate, AND/OR Mendeley
You know all those things you wish your CV was smart enough to
do--embed your papers, automatically give you readership statistics, and
so on? Academia.edu, ResearchGate, and Mendeley are three academic social networks that allow you to do these things, and then some.
Perhaps more importantly, they’re places where your colleagues are
spending a lot of their time. Actively participating on one or all three
networks will give you ample opportunity to have greater reach with
other researchers. And getting your publications and presentations onto
these sites will make it easier for others to encounter your work. They
do this not only through the social network they help you build, but
also by improving the search engine optimization (SEO) of your research,
making you much more “googleable."
Let’s get started! Choose one of the academic social networks to begin with:
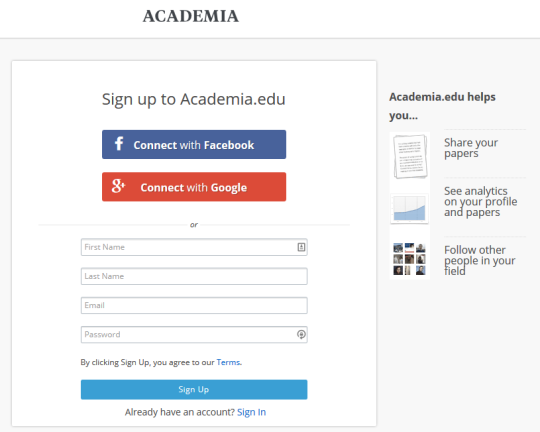
If you’re a firm believer in keeping your professional online
presence separate from your personal one, you’ll likely want to sign up
using your university email address. Otherwise, you can sign up using
your Facebook or Google profile.
Step 2: Post a publication or two
How do you choose what to share? If you’re an established researcher,
this will be easy: just choose your most “famous” (RE: highly cited)
paper. If you’re a junior researcher or a student, choosing might be
tougher. A peer-reviewed paper is always a good bet, as-is a preprint or
a presentation that’s closely related to your most current topic of
research.
HOWEVER...it is important todetermine whether or not you have rights to post any given publication.
Generally speaking, when you publish an article with a traditional
publisher, you sign away your copyright. And that means you may not have
the rights to post the publisher’s version of your article on
Academia.edu. (If you negotiated to keep your copyright or published
with an authors’ rights-respecting journal like PLOS Biology, give
yourself a pat on the back and skip the following paragraph.)
If you don’t have copyright of your paper, all hope is not lost! You likely have the right to post a version of the article (often the unedited, unformatted version). Head over to Sherpa/Romeo
and look up the journal in which you published. You’ll see any and all
restrictions that the publisher has placed on how you can share your
article.
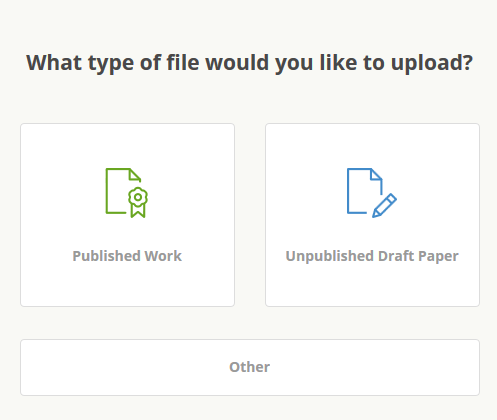
Once you're certain you have the rights to post an article, upload the file to Academia.edu.
Select the type of paper you will upload—published, unpublished, or other.
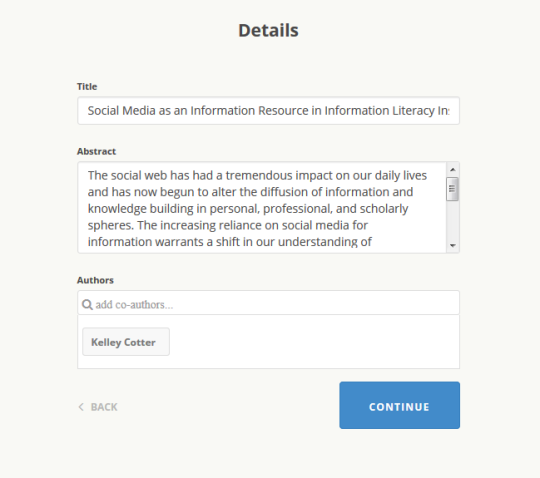
On your computer, find the publication you want to upload. Click “Open.”
Enter information about your paper and click continue.
If you chose to upload a draft, decide whether to open your paper to comments.
Add some research interest keywords that will help others find your publication. Click save.
If you chose to upload a draft, invite contacts to offer feedback.
Step 3: Add your affiliation to your profile
Adding an affiliation is important because it will add you to a
subdomain of Academia.edu built for Duquesne, and that will allow you to
more easily find your colleagues.
Hover your mouse over your profile picture in top right-hand side of the page. A drop-down menu will pop up.
Click on your name.
Beneath your name, click the button that reads "EDIT” and click "Affiliations"
Enter your information. Click Save.
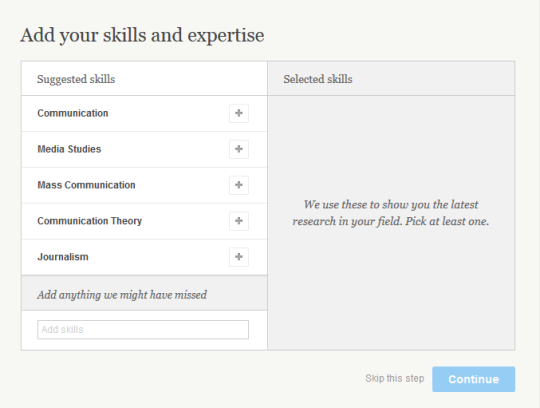
Step 4: Add your research interests
These are also important; they’ll help others find you and your work.
Click the “Edit” link in the gray box below your name.
Click the box labeled “Research Interests.”
Enter your research interests. Click the X when you are finished.
Step 5: Connect with your colleagues who are already on Academia.edu
Hover your mouse over your profile picture in top right-hand side of the page. A drop-down menu will pop up.
Click on “Find Friends.”
You can either connect your Facebook account or an email account to
Academia.edu, which will search your contacts and suggest connections.
Alternately, you can also simply search for your colleagues via the main search box.
Step 6: Check out your analytics
Click the “Analytics” tab at the top of your screen and poke around a
bit. Because you just created your profile, you likely won’t yet have
any metrics. But in as little as a few days, you may begin to see
download and page view statistics for your profile and your
publications, along with other interesting information like maps. All of
this data can help you better understand the use your work is getting
from other researchers! We'll touch on this again briefly on Day 5.
A caveat: Academia.edu stats are only for content hosted on
Academia.edu, so it can’t tell you much about readership or citations of
your work that’s hosted on other platforms. And since it’s likely that
your entire field isn’t active on Academia.edu that means Academia.edu
stats aren’t representative of your full impact.
Congrats, you’ve now got an Academia.edu profile! You can continue to
spruce it up by adding more publications, as well as adding a photo of
yourself and other research interests and publications, and connecting
your Academia profile to other services like Twitter and LinkedIn, if
you’re already on ‘em. (If not, don’t worry--we’ll cover that soon.)
Are you hangin’ in there? Tomorrow, we’ll master LinkedIn. Get ready!
ResearchGate claims 9 million users,
and it will help you connect with other researchers. It can also help
you understand your readers through platform-specific metrics, and
confirm your status as a helpful expert in your field with its “Q&A”
feature.
ResearchGate requires you to use your university email address as a
means of verifying you are a researcher. Enter your name, Duquesne
email address, and create password.
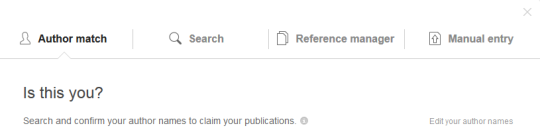
Find and add publications. ResearchGate will match
publications with your name and information that you can confirm via
“Author Match.” When you first signup, you are prompted to confirm
publications. Once you create your profile, you can add more
publications (see below).
Activate your account by confirming your email address.
Step 2: Add publications
ResearchGate allows you to search for your publications by title,
author name, or DOI. You can add published and unpublished works.
In the top right corner, click the "Add New" button. Select publication.
Select the type of publication you wish to add.
Select Manual entry to upload your personal documents into ResearchGate.
If you are adding journal articles, you will see the Author Match
suggestions again, but you may also choose to search for your
publication, upload your publications via a reference file (i.e. the
Reference manager tab), or manually enter your publication.
How do you choose what to share? If you’re an established
researcher, this will be easy: just choose your most “famous” (read:
highly cited) paper. If you’re a junior researcher or a student,
choosing might be tougher. A peer-reviewed paper is always a good bet,
as-is a preprint or a presentation that’s closely related to your most
current topic of research.
HOWEVER...it is important todetermine whether or not you have rights to post any given publication.
Generally speaking, when you publish an article with a traditional
publisher, you sign away your copyright. And that means you may not have
the rights to post the publisher’s version of your article on
Academia.edu. (If you negotiated to keep your copyright or published
with an authors’ rights-respecting journal like PLOS Biology, give
yourself a pat on the back and skip the following paragraph.)
If you don’t have copyright of your paper, all hope is not lost! You likely have the right to post a version of the article (often the unedited, unformatted version). Head over to Sherpa/Romeo
and look up the journal in which you published. You’ll see any and all
restrictions that the publisher has placed on how you can share your
article.
Find an article you have the rights to share and upload it.
Now that you have your profile set up, let’s drill down into the three unique features of ResearchGate.
Step 3: Find other Researchers & Publications
ResearchGate automatically creates a network for you based on who
you’ve cited, who you follow and what discipline you selected when
setting up your profile. So, the key to creating a robust network is
uploading papers with citations to be text-mined, and searching for and
following other researchers in your field.
Use the search bar at the top of the screen and type in your
colleague’s name. If they’re on the site, they’ll appear in the dynamic
search results.
Click on your colleague’s name in the search results to go to their
profile, where you can explore their publications, co-authors, and so
on, and also follow them to receive updates.
ResearchGate also text-mines the publications you’ve uploaded to find
out who you’ve cited. Using that information, they add both researchers
you’ve cited and those who have cited you to your network. Your network
also includes colleagues from your department and institution.
To search for specific publications or if you are seeking a
publication on a topic, you can use the search function on the homepage
(located in the top-right corner) to browse publications:
If you find an interesting publication, you can click the paper title to read the paper or click on the author’s name to
be taken to their profile. And on the author’s profile, you can explore
their other publications or choose to follow them, making adding a new
colleague to your network a piece of cake.
Step 4: ResearchGate Score & Stats
The ResearchGate score is an indicator of your popularity and
engagement on the site: the more publications and followers you have,
plus the more questions you ask and answer, all add up to your score.
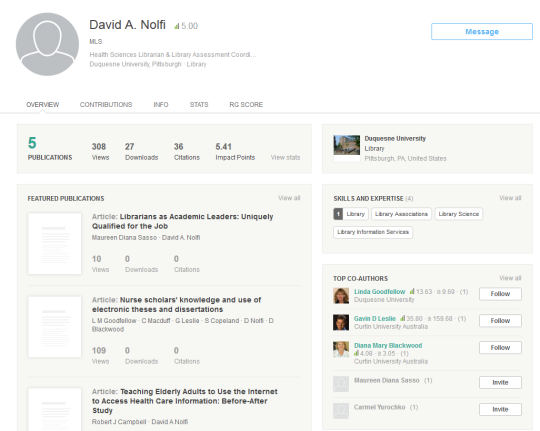
Check out Duquesne’s own Michael Van Stipdonk’s ResearchGate score:
ResearchGate also helpfully provides a percentile (seen above on the
right- hand side), so you know how a score stacks up against other users
on the site. The score isn’t normalized by field, though, so be aware
that using the score to compare yourself to others isn’t recommended.
All that said, ResearchGate scores are fun to play around with and explore. Just be sure not to take them too seriously.
The ResearchGate stats are also illuminating: they tell you
how often your publications have been viewed and cited on ResearchGate
(recently and over time), what your top publications are, and the
popularity of your profile and any questions you may have asked on the
site’s Q&A section.
On your profile page, you’ll see a summary of your stats. If you
click on those stats, you’ll be taken to your stats page, which breaks
down all of your metrics with simple visualizations. We'll touch on this
again briefly on Day 5.
Step 5: Q&A
In the Q&A section, anyone can pose a question, and if it’s
related to your area of expertise, ResearchGate will give you the
opportunity to answer. Basically, it’s a good opportunity to help other
researchers and get your name out there.
Click on “Questions" at the top of your screen and explore the
various questions that have been posed in your discipline in recent
weeks. You can also search for other topics, and pose questions
yourself.
Two more cool ResearchGate features:
The site mints DOIs, meaning that if you need a permanent identifier for an unpublished work, you can get one for free (though keep in mind that they haven’t announced a preservation plan, meaning their DOIs might be less stable over time than DOIs issued by a CLOCKSSS-backed repository like Figshare).
You can request Open Reviews of your work, which allows
anyone on ResearchGate who’s in your area of expertise to give you
feedback--a useful mechanism for inviting others to read your paper.
It’s a feature that hasn’t seen much uptake, but is full of
possibilities in terms of publicizing your work.
Are you hangin’ in there? Tomorrow, we’ll master LinkedIn. Get ready!
Mendeley is a little different from Academia.edu and ResearchGate.
Mendeley serves as reference manager with a social network component ,
providing ways to connect with other researchers that you can’t find on
other platforms.
Mendeley Web (the online counterpart to the desktop reference
management software) is similar to Google Scholar in several ways.
What’s distinctive about Mendeley is that it offers better opportunities
to interact with other researchers and get your research in front of
communities that might be interested in it, in a context where they’re
largely interacting with scholarship they intend to actually read and
cite.
Moreover, Mendeley’s Readership Statistics can tell you a lot about
the demographics that have bookmarked your work – an important indicator
of who’s reading your work and who might cite it in the future.
Step 1: Create a profile
Logon to Mendeley.com and click the “Create a free account” button.
Create a login and, on the next screen, enter your general field of
study and your academic status (student, professor, postdoc, etc.).
As you advance to the next screen, beware: Mendeley Desktop will
automatically start downloading to your computer. (You’ll need the
Desktop edition to make the next step a bit easier on yourself, but you
can also make do without it. Your call.) Download it and install it if
you plan to use it for the next step–importing your publications.
Step 2: Import your publications
If you installed Mendeley Desktop, your job is fairly easy...
Fire up Mendeley Desktop and select “My Publications” from the “My Library” panel in the upper left corner of the screen.
Click File > Import > BibTeX (.bib) on the main menu.
On your computer, find the citations.bib file you exported from
Google Scholar, select it, and click “Open.” Mendeley will begin to
import these publications automatically.
In the dialog box that appears, confirm that you are the author of
the documents that you’re importing, and that you have the rights to
share them on Mendeley. Click “I agree.”
Click the “Sync” button at the top of the Desktop screen to Sync your local Mendeley library with your Mendeley Web library.
That’s it! You’ve just added all your publications to your Mendeley
profile. And you now know how to add any missing publications that
didn’t auto-import, to boot.
If you didn’t install Mendeley Desktop, here’s how to add your references manually using Mendeley Web:
Click the “My Library” tab.
Click the “My Publications” link on the top left.
Click the blue “Add” button on the top right.
Select “Add entry manually…” from the drop-down menu.
Specify what type of document you’re adding (article, book section, thesis, etc.).
Complete as many fields as possible so others can find your
publication more easily. If an Open Access link to the full-text of your
publication exists, provide it in the URL box. And be sure to add a
DOI, if you’ve got one.
Click “Save” when finished.
Repeat as necessary, until all your articles are added to your profile.
Here’s what a profile page will look like after you’ve added publications to your My Publications library:
Step 3: Follow other researchers
Now you’re ready to connect with other researchers. Consider this
step akin to introducing yourself at a conference over coffee: informal,
done in passing, and allowing others to put a face to a name.
Search for colleagues or well-known researchers in your field by
name from the Mendeley search bar in the upper right-hand screen of
Mendeley Web:
Be sure to select “People” from the menu, so you search for profiles and not for papers that they’ve authored.
When you find their profile, click on their name in the search
results, and then click the “Follow” button located next to the author's
profile picture:
That’s it! Now you’ll receive updates on your Mendeley homepage when
they’ve added a new publication to their profile or done something else
on the site, like join a group.
Step 4: Join groups relevant to your research
If “following” a colleague is like introducing yourself during a
conference coffee break, joining groups is like joining a “Birds of a
Feather” group over lunch, to talk about common interests and get to
know each other a bit better.
Mendeley groups are places where researchers interested in a common
topic can virtually congregate to post comments and share papers. It’s a
good place to find researchers in your field who might be interested in
your publications. And it’s also the single best place on the platform
to learn about work that’s recently been published and is being talked
about in your discipline.
To find a group, search for a subject using the search toolbar you
used to find colleagues, making sure to select “Groups” from the
drop-down menu.
Look through the search results and click through to group pages to
determine if the group is still active (some groups were abandoned
long-ago).
If so, join it! And then sit back and enjoy all the new knowledge
that your fellow group members will drop on you in the coming days,
which you can view from either the group page or your Mendeley Web home
screen.
And you can feel free to drop some knowledge on them, too. Share your
articles, if relevant to the group’s scope. Pose questions and answer
others’ questions. Openly solicit collaborators if you’ve got an
interesting project in the pot that you need help on, like Abbas here
has:
Use groups like you would any other professional networking
opportunity: as a place to forge new connections with researchers you
might not have a chance to meet otherwise.
Step 5: Learn who’s bookmarking your work
Once your work is on Mendeley, you can learn some basic information
about who’s saving it in their libraries via Mendeley’s Readership
Statistics. This is important to know because Mendeley bookmarks are a
leading indicator for later citations.
To see the readership demographics for your publications, head to the article’s page on Mendeley.
On the right side of the screen, you’ll see a small Readership Statistics panel:
Readership Statistics can tell you how many readers you have on Mendeley
(how many people have bookmarked your publication), what discipline
they belong to, their academic status, and their country. Very basic
information, to be sure, but it’s definitely more than you’d know about
your readers if you were looking at the number of readers alone.
Limitations
You can’t easily extract readership information for your publications
unless you use Mendeley’s open API (too high a barrier for many of us
to pass). So, you’ll need to cut-and-paste that information into your
website, CV, or annual review, just as you would when using Google
Scholar.
Additionally, if you want to add new publications, you’ll have to do
it yourself. Mendeley doesn’t auto-add new publications to your profile
like Google Scholar or other platforms can.
Are you hangin’ in there? Tomorrow, we’ll master LinkedIn. Get ready!


 If you find an interesting publication, you can click the paper title to read the paper or click on the author’s name to
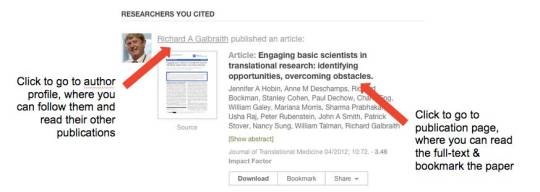


 Use groups like you would any other professional networking


Great post, thanks for sharing!
ReplyDeleteHương Lâm với website Huonglam.vn chuyên cung cấp máy photocopy toshiba cũ và dòng máy máy photocopy ricoh cũ uy tín, giá rẻ nhất TP.HCM